Saturday, February 25, 2012

Easiest Fabric-covered bulletin board ever


  Here is the easiest craft I think I have ever done, and I didn't buy a gosh darn thing for it! I pulled out my sewing machine today to mend a few clothes that I have been putting off for a while now (a comforter that Honey cut the tag off of a little too close, a fallen hem on Honey's fave superhero PJ pants, you know... the usual). When I took my supplies out, I remembered that I had bought way too much fabric when I made my sewing machine cover a few months ago. I've also been trying to figure out what to do with my plain Jane bulletin board that I use to pin up my card orders and other craft reminders. So I "two birds with one stone"d it, and Voila! I used the fabric, AND I've got a new (looking) board.


Use a craft spatula to squeeze the fabric into the crevice between the cork and the frame

  Lucky for me, the fabric scrap was almost the exact size it needed to be. Start off by ironing the fabric (unlike me, who forgot and had to iron it once itwas already in the board and against the cork- oops). The key is that the fabric is just about 1 inch longer and wider than the opening (exposed cork). Too small, and it won't cover the cork, too big and it won't stuff under the frame (check out the picture above). I was going to use craft glue to secure it in place, but its unnecessary and I wasn't sure I was ready to commit to this fabric. I like the idea of being able to change out the fabric with the seasons. I used my Cricut craft spatula to smoosh the tiny bit of extra fabric into the crevice between the cork and the frame. You want something super thin, and with rounder edges. In a pinch I guess you could use something like a paint/spackle spatula, but I would worry about the sharp corners poking holes in the fabric rather than tucking it under the frame. Well, there you have it... as I tell my students: "easy-peasy, lemon-squeezy"!

Sewing Machine Cover

DIY Sewing Machine Cover


  I thought I'd share the very first project I did in my craft room. When I first got my craft room, it was pretty bare. I had some acrylic paint, markers, and a sewing kit. Part of the birthday gift from Honey that came along with the craft room was a sewing machine. Not one I borrowed from Mom, not an Easy Stitch, not a Sew Easy (yes, I had one)... A REAL SEWING MACHINE! So I thought it would be fun if my first project on the machine was a cover for the sewing machine itself.


                            Sew Easy (all of 9" across)                    My sewing Machine


  When I found out that Honey had bought me a sewing machine, I was a little scared at first. But I must admit, he did very well. Not to fancy-schmancy, but does everything I would need it to do. I would have loved to have been there when he was purchasing it. He said he spent about 30 minutes in the aisle at the store, looking them up on Amazon through his phone, and finally settled on this one because the accent color matched the room and it was Martha-approved. LOL! Well, on to the project...

  This was my first project without a pattern that was not a simple square pillow, so bear with me. You'll want to iron out your fabric before you begin, so that everything lays nice and flat while you work. First thing I did was to use paper to trace out the left and right faces of the machine. Its important to add between half an inch and an inch for hem, or make the whole thing longer to be on the safe side (you can always shorten it later). I figured that I could use two panels for those, then have one continuous piece of fabric to go up the front, over and down the back. My machine is curvy. If you have an older, boxier machine, you could make the cover out of 5 separate square pieces.

Look at all those unnecessary pins!


  After using the paper to make the shape of the sides, trace the form onto the back of your fabric. The picture shows pins, but I realized quickly (actually more like when I cut it out and noticed I had 4 pieces instead of 2) that you either need to pin through two layers and cut once, or trace twice, dont pin and cut twice. Oh well... Then I used the measurement of the perimeter of the shape (without the base) to cut the strip that would become the front/top/back of the cover. Sew the pieces together with a simple straight stitch with some matching thread. This was the point in the project when I remembered why I HATE switching or adding the thread color. Bobbins and I just never got along. In my mom's old machine, the bobbin liked to slip, jump, or just plain refuse to come up. Luckily, this one was much more cooperative (and I had an instruction manual).

Demon bobbin always threatening my sanity


  Turn the cover right side out, and test it out before you hem. This is a good time to figure out the length. It's good for it to be just barely touching the table. Enough to keep dust out without looking baggy and messy. I needed to snip mine in a few places, then I ironed the hem in place with some heat-bond tape (I love that stuff!).  After that, one more quick straight stitch around the whole bottom to complete the hem.

Check for length before hemming


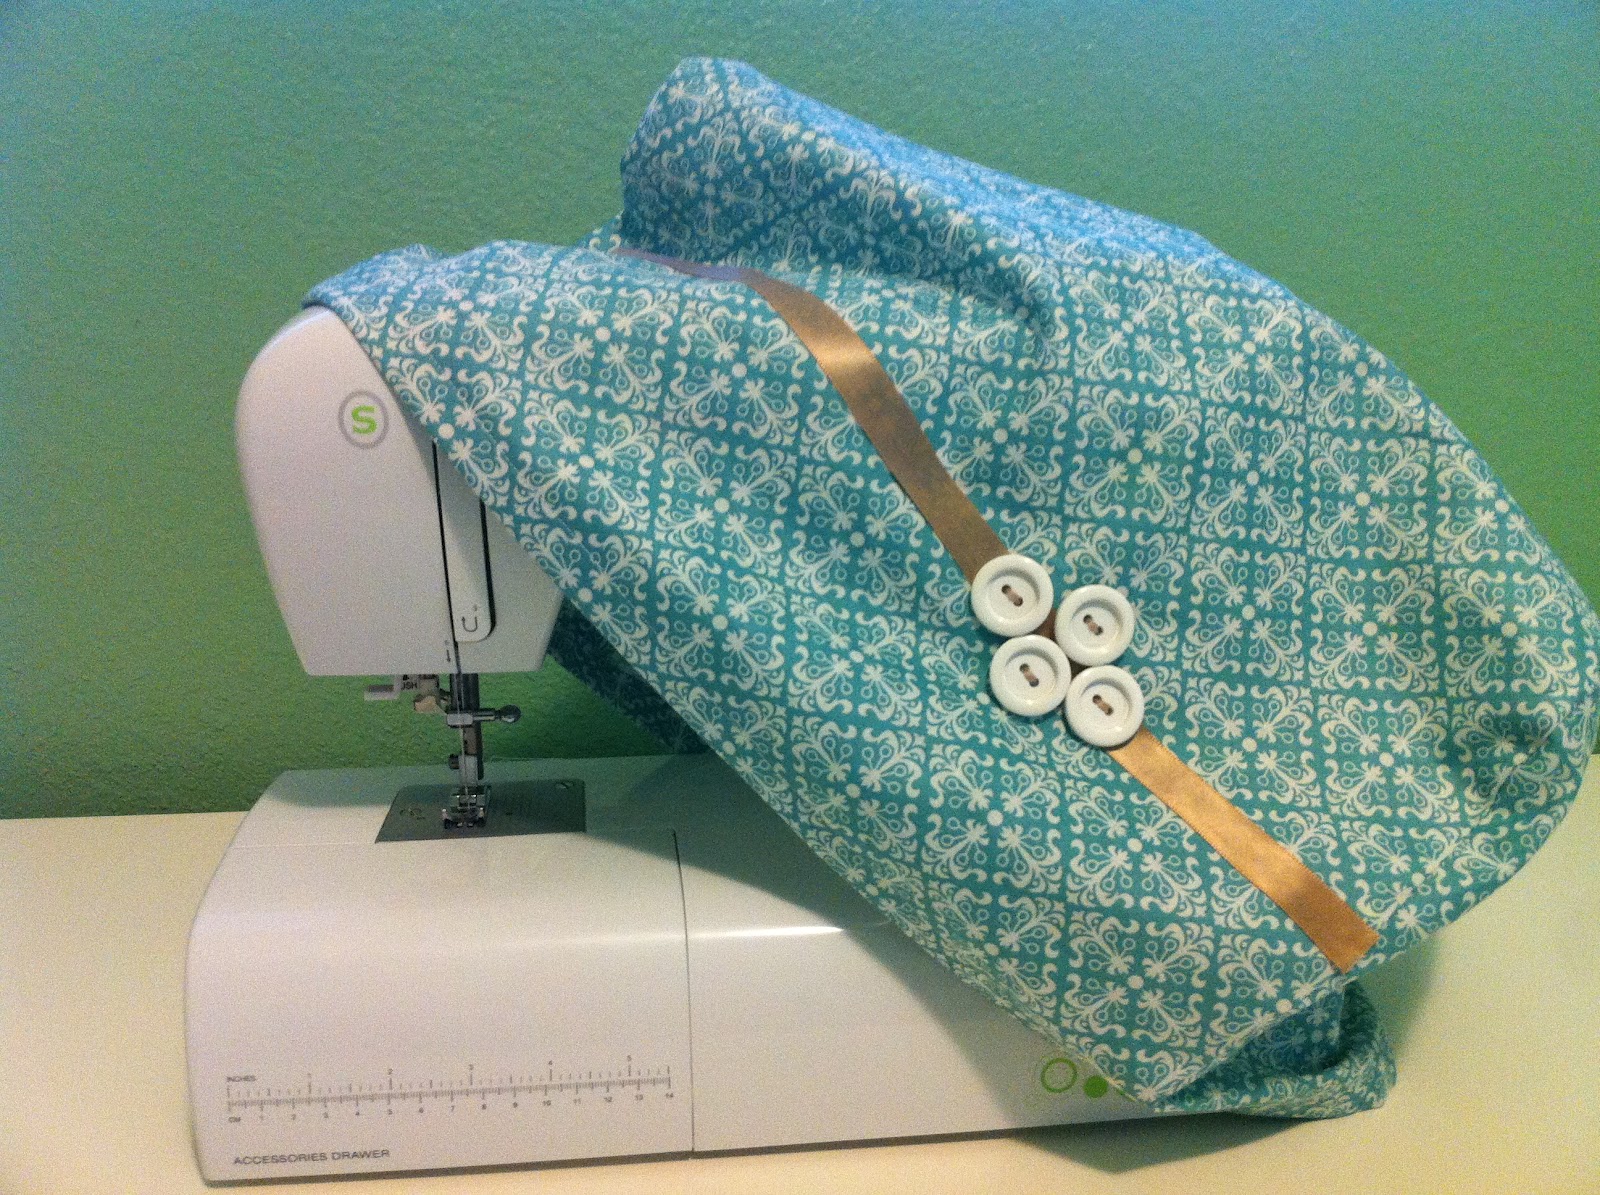
  I couldn't just leave the cover plain, so I decided to add some ribbon and buttons. So I got all of my thing ready, cut some hem tape, and started to iron the ribbon in place ...then it melted. It immediately stuck to the iron and gunked on like toffee. So I had to get creative and use a pair of scissors covered in scrap fabric to scrape it off the iron. Yikes!  Lesson learned. I opted for quick dry fabric glue instead. 

                                Hot ribbon toffee mess                                Plan B


 Once it mostly dried, I hot glued the buttons in place to get the spacing right for sewing them into place (just a dot on each). A few hand stitched in thread color to match the ribbon, and voila! DONE!


Meet Mandi Marie


  I'm Mandi Marie. I'm 26 and live in Orlando, FL with my fiance. I'm Cuban-American, born and raised in Miami. I'm a cancer survivor and recent college graduate, now teaching third grade in public school. I'm the kind of person that can't just sit at home and do nothing. I'm used to having way too much to do in way too little time. It started in high school, when I was in just about every extracurricular club. Then came college, and I held a job each semester aside from my course load. By my last year in college, I was living with my Honey in the house of my dreams. Honey is perfectly happy lounging around the house on the weekends do little to nothing, and until now, this hadn't been a problem because I had a load of things to catch up on (homework, studying, papers, classes, work, housework, guests...). But as graduation got nearer, it became apparent that something would have to be done if Honey and I were going to be able to survive each weekend (with him being able to lounge, and me not dying of boredom). Fast forward through a hundred or so "Honey, I'm bored"s, a couple dozen Martha Stewart Living magazines, and a few trips to Ikea and this is what was waiting for me on my birthday:


  This was back in March of 2011. Until then, this had been a guest room. Its funny to look back on this now, since the room has changed so much since then. This room (and the Cricut machine my dad and stepmother gave me for graduation) ended up striking the match and lighting my adult-crafting fire (Honey isn't complaining..). I have been crafting in one way or another for as far back as I can remember, all thanks to Mom. Growing up, my sister and I spent every other weekend at Mom's, and she always kept some of those cheap craft kits around the house (make your own lipgloss kits, jewelry makers, beeswax candle kits, etc). We had so much fun! I never stopped crafting, but now I stick to bigger and better tools.


 I've got some strong cooking and baking genes, too. My mom is a big baker, and I loved joining her. She's known for her cheesecakes and pies in our family. As a little girl I would get excited to put on an apron and help my grandmother on my mom's side "bake" after school (looking back, all I really did was stand on a chair and scoop or mix ingredients and maybe open the cans). My grandmother on my dad's side (Abuelita) is Cuban, and everyone just about claws their way to her table when food is served; real homemade, made-from-scratch goodness. I can only HOPE to someday cook like that! These days, I don't do too bad for myself. I have a few dishes that friends and family beg me for time and time again. Even Abuelita has asked me for a recipe or two. Whether a recipe turns out right for me or not (though I just about throw a tantrum when it doesn't - it's not pretty), I really enjoy it. I have been cooking dinner for my family since I was about 12, and when I moved in with friends in college, I was the "mom", cooking dinner for us each night. I was asking for kitchen tools for birthdays and Christmases since I was 18. 


  I don't pretend to be an expert. I've never taken a cooking class; what I know is a combination of watching my family when I was younger, the Food Network, and good ole trial & error. I'm not Martha Stewart. What you'll find here is not an end-all-be-all. It's purpose is to instruct, to document my improvement over time, and to solicit ideas and tips. Enjoy!