DIY Sewing Machine Cover
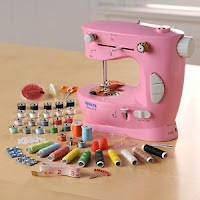
I thought I'd share the very first project I did in my craft room. When I first got my craft room, it was pretty bare. I had some acrylic paint, markers, and a sewing kit. Part of the birthday gift from Honey that came along with the craft room was a sewing machine. Not one I borrowed from Mom, not an Easy Stitch, not a Sew Easy (yes, I had one)... A REAL SEWING MACHINE! So I thought it would be fun if my first project on the machine was a cover for the sewing machine itself.
Sew Easy (all of 9" across) My sewing Machine
When I found out that Honey had bought me a sewing machine, I was a little scared at first. But I must admit, he did very well. Not to fancy-schmancy, but does everything I would need it to do. I would have loved to have been there when he was purchasing it. He said he spent about 30 minutes in the aisle at the store, looking them up on Amazon through his phone, and finally settled on this one because the accent color matched the room and it was Martha-approved. LOL! Well, on to the project...
This was my first project without a pattern that was not a simple square pillow, so bear with me. You'll want to iron out your fabric before you begin, so that everything lays nice and flat while you work. First thing I did was to use paper to trace out the left and right faces of the machine. Its important to add between half an inch and an inch for hem, or make the whole thing longer to be on the safe side (you can always shorten it later). I figured that I could use two panels for those, then have one continuous piece of fabric to go up the front, over and down the back. My machine is curvy. If you have an older, boxier machine, you could make the cover out of 5 separate square pieces.
Look at all those unnecessary pins!
After using the paper to make the shape of the sides, trace the form onto the back of your fabric. The picture shows pins, but I realized quickly (actually more like when I cut it out and noticed I had 4 pieces instead of 2) that you either need to pin through two layers and cut once, or trace twice, dont pin and cut twice. Oh well... Then I used the measurement of the perimeter of the shape (without the base) to cut the strip that would become the front/top/back of the cover. Sew the pieces together with a simple straight stitch with some matching thread. This was the point in the project when I remembered why I HATE switching or adding the thread color. Bobbins and I just never got along. In my mom's old machine, the bobbin liked to slip, jump, or just plain refuse to come up. Luckily, this one was much more cooperative (and I had an instruction manual).
Demon bobbin always threatening my sanity
Turn the cover right side out, and test it out before you hem. This is a good time to figure out the length. It's good for it to be just barely touching the table. Enough to keep dust out without looking baggy and messy. I needed to snip mine in a few places, then I ironed the hem in place with some heat-bond tape (I love that stuff!). After that, one more quick straight stitch around the whole bottom to complete the hem.
Check for length before hemming
I couldn't just leave the cover plain, so I decided to add some ribbon and buttons. So I got all of my thing ready, cut some hem tape, and started to iron the ribbon in place ...then it melted. It immediately stuck to the iron and gunked on like toffee. So I had to get creative and use a pair of scissors covered in scrap fabric to scrape it off the iron. Yikes! Lesson learned. I opted for quick dry fabric glue instead.
Hot ribbon toffee mess Plan B
Once it mostly dried, I hot glued the buttons in place to get the spacing right for sewing them into place (just a dot on each). A few hand stitched in thread color to match the ribbon, and voila! DONE!


No comments:
Post a Comment